Tutorial - custom database and UI
In this tutorial, we’ll create an extra table in the SuperOffice database to organize equipment units (inventory) and relate them to requests and companies. Then we’ll create a custom screen in SuperOffice Service and finally make the table available as a web panel in Sales.
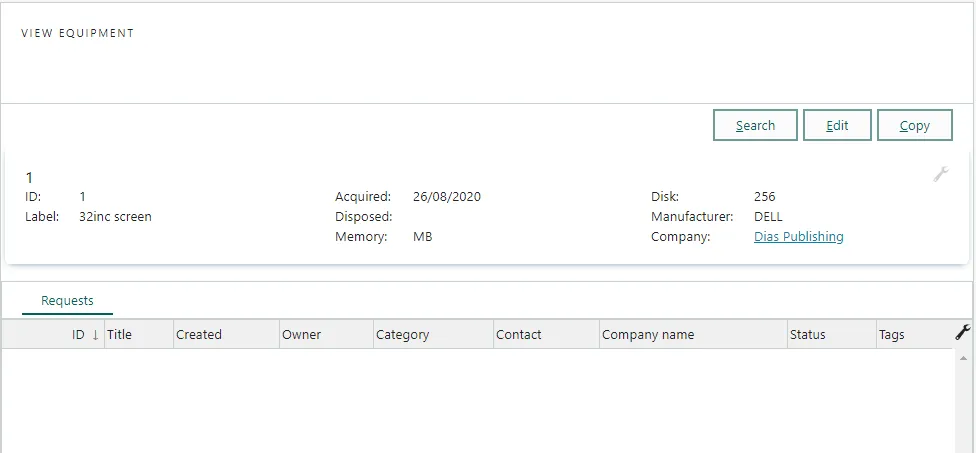
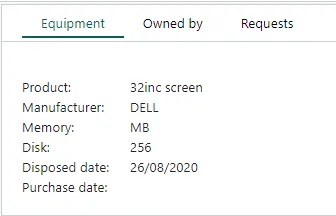
View equipment:
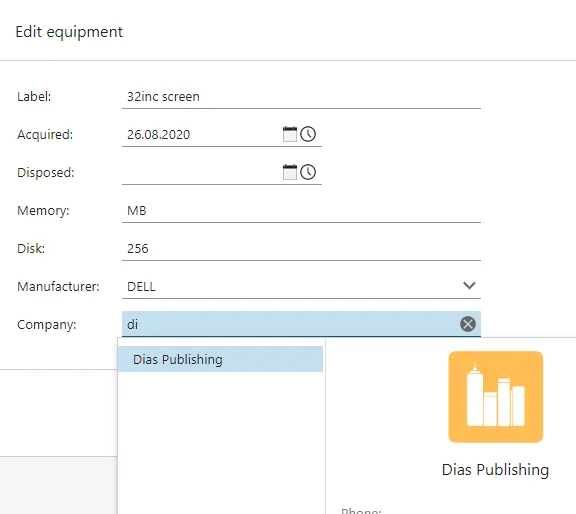
Selecting company on equipment:
Step 1: create the table
Name: Equipment
Database table: y_equipment
Fields:
| Name | Database field | Type | Other settings | Description |
|---|---|---|---|---|
| Label | x_label | Text (short) | Cannot be empty Show in table View in rel. choosers | A label for the unit |
| Acquired | x_acquired | Date | Show in table | When the unit was acquired |
| Disposed | x_disposed | Date | Show in table | When (if ever) the unit was disposed |
| Memory | x_memory | Text (short) | Show in table | Amount of memory |
| Disk | x_disk | Text (short) | Show in table | Amount of disk space |
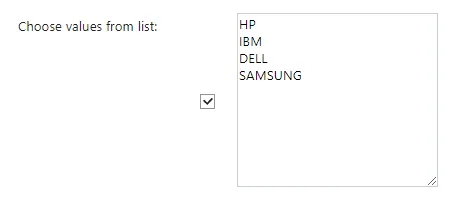
| Manufacturer | x_manufacturer | Text (short) | Show in table Choose values from list | The manufacturer (drop-down) |
- Sign in to SuperOffice Service and open the Tables screen.
- Click New table.
- Set table properties. Then click OK to save.
- Add fields to your new table. For each field:
- Point to the Equipment table and click New field.
- Select a type for the new field and click OK.
- Set field properties.
- Click OK to save the new field.
- Click the table link to get to the Edit table screen.
- Set Label as the Sort order and Name field. Then click OK.
- Click Restart NetServer.
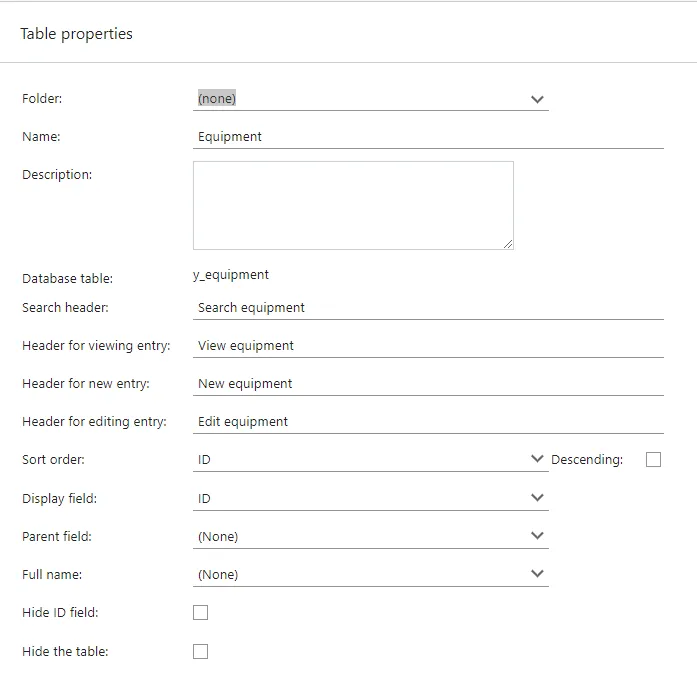
Table properties:
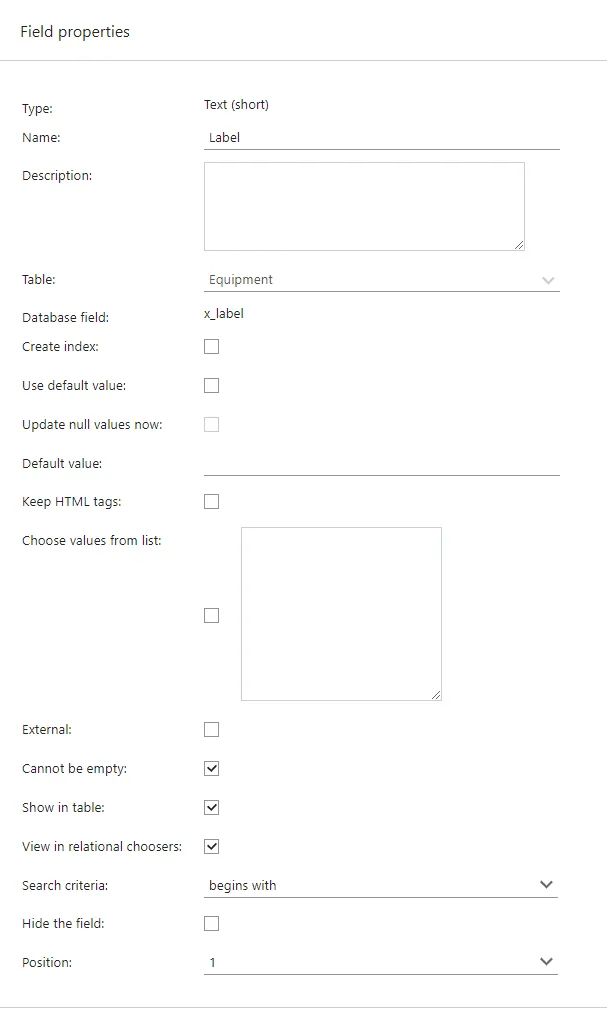
Element properties:
Choose values from list:
Step2: relate equipment to requests and company
Next, we want to connect requests to equipment, so that we can easily track our request history for a certain equipment unit.
When relating tables, always consider the direction of a many-to-1 relationship. This determines which table you add the foreign key (FK) to.
Requests
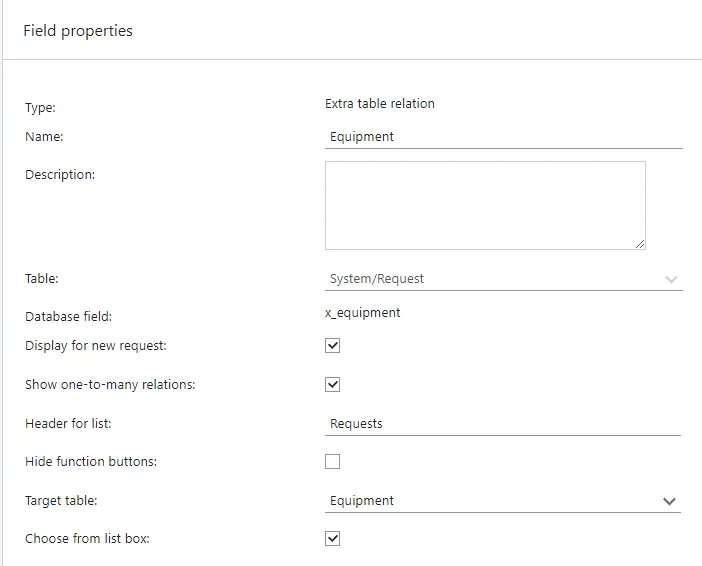
Because we want to have many requests related to 1 equipment unit, we’ll create the relational field on the request table. We also want to register all equipment owned by a company. This is the opposite direction (many equipment units for one company), so we’ll addd the FK to the Equipment table.
- Open the Tables screen.
- Point to the Requests table and click New field.
- Select type Extra table relation and click OK.
- Set element properties and click OK.
- Click Restart NetServer.
Company
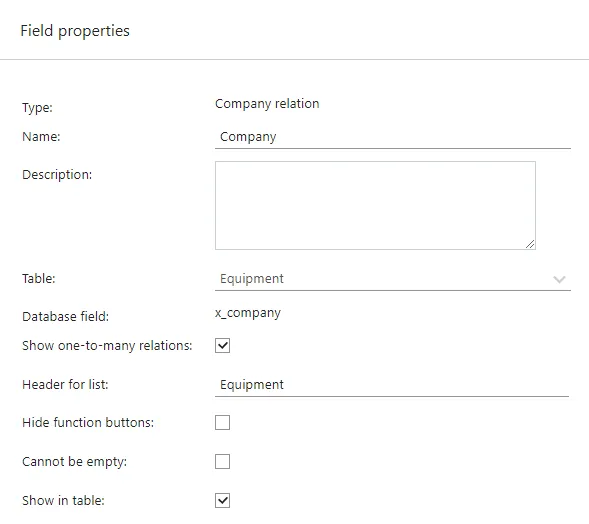
We also want to register all equipment owned by a company. This is the opposite direction (many equipment units for one company), so we’ll addd the FK to the Equipment table.
- Open the Tables screen.
- Point to the Equipment table and click New field.
- Select type Company relation and click OK.
- Set element properties and click OK.
- Click Restart NetServer.
Fields
| Name | Database field | Type | Add to table | Other settings |
|---|---|---|---|---|
| Equipment | x_equipment | Extra table relation | Requests | Enter Requests in Header for list Select your Equipment table under Target table |
| Company | x_company | Company relation | Equipment | Enter Equipment in Header for list Select Show in table |
Step 3: add default Equipment screen to the Service navigator
We can add direct access to our table in the navigator (main menu) in Service.
- Open the CRMScript page and select the Triggers tab.
- Click New trigger(script).
- Type
mainin the search field and then select the Main menu trigger. - Copy and add the following script code and save the trigger.
- Activate the trigger
- Refresh your browser to make sure the new menu is loaded.
MainMenu menu = getMainMenu();
menu.addGroup("Equipment", "/graphics/picture.png", 1);
menu.addItem("List equipment", getProgram(1) + "&action=listExtraTable&extraTable=y_equipment", 1, 0);
menu.addItem("New unit", getProgram(1) + "&action=editExtraTableEntry&extraTable=y_equipment", 1, 1);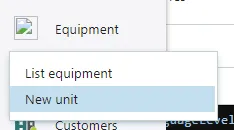
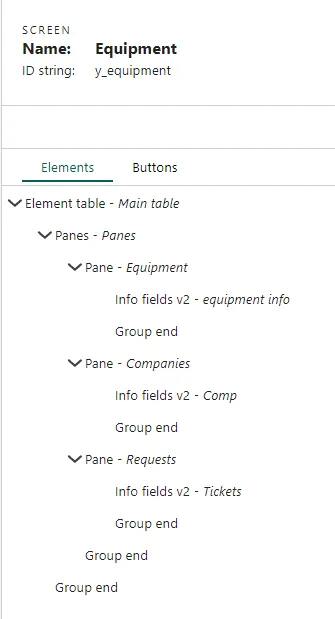
Step 4 (optional): create a custom screen
Rather than using the default generated Equipment screen, we can design our own. Here, we’ll create 3 elements, each in its own pane.
When you’re done, the tree should look like this:
- Open the Screens page and click New screen.
- Enter screen properties (name = Equipment) and click OK.
- Add elements to your new screen. For each element:
- Click New element.
- Select the element type and enter a name.
- Copy the corresponding config into the Simple values tab.
- Click Apply. Then click OK.
- Toggle preview to test your current screen.
- Set up a screen chooser.
Elements
| Name | Type | Description |
|---|---|---|
| Equipment | Pane | Wrapper for equipment info |
| Info | Info fields v2 | Displays info about the equipment |
| Companies | Pane | Wrapper for company info |
| Company | Info fields v2 | Displays info about the equipment |
| Requests | Pane | Wrapper for ticket info |
| Tickets | Data table | Displays info about the requests |
Pane - simple values:
renderMode = visited
verticalSpace = rest
title =
Set the title for each pane identical to the element name.
Info - simple values:
fields.0.field = y_equipment.x_label
fields.0.label = Product
fields.1.field = y_equipment.x_manufacturer
fields.1.label = Manufacturer
fields.2.field = y_equipment.x_memory
fields.2.label = Memory
fields.3.field = y_equipment.x_disk
fields.3.label = Disk
fields.4.field = y_equipment.x_acquired
fields.4.label = Disposed date
fields.5.field = y_equipment.x_disposed
fields.5.label = Purchase date
fields.length = 6
Company - simple values:
fields.0.field = y_equipment.x_company
fields.0.label = Company
fields.length = 1
label = Company
Tickets - simple values:
criteria.0.field = ticket.x_equipment
criteria.0.indent = 0
criteria.0.operator = OperatorEq
criteria.0.rowOperator = OperatorAnd
criteria.0.value = y_equipment.x_label
criteria.length = 1
fields.0.field = ticket.title
fields.0.label = Title
fields.1.field = ticket.status
fields.1.label = Status
fields.length = 2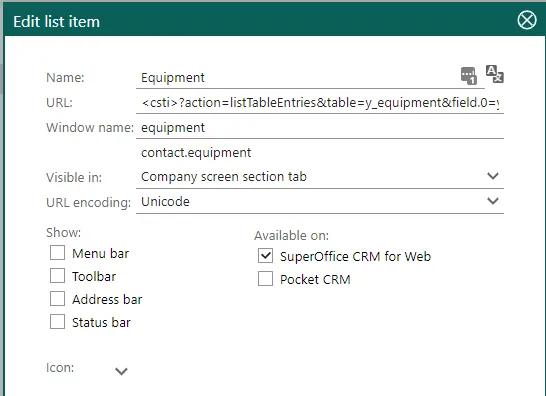
url = ticket.exe?action=listTicket&ticketId=Step 5: add the table to Sales as a web panel
- Sign in to the SuperOffice CRM Admin client.
- Select Lists.
- Using the drop-down at the top, select GUI - Web panel. Then click Add (bottom left corner).
- Enter a name (Equipment) and window name (ID).
- Enter URL and select URL encoding.
<csti>?action=listTableEntries&table=y_equipment&field.0=y_equipment.x_company&value.0=<cuid>&x_company=<cuid>
- Select display location Section tab in Company Screen.
- Click Save.
- Test the result.

Parameters in this URL:
| Parameter | Description |
|---|---|
| <csti> | Shorthand for site address and base program |
| action=listTableEntries | The method in ticket.exe for listing table entries |
| table=y_equipment | Our Equipment table |
| field.0=y_equipment.x_company | The 1st field in the where-criteria of our query |
| value.0=<cuid> | The corresponding value for field.0 Template variable for the ID of the current company |
| x_company=<cuid> | Pre-fills the company ID value in the New entry dialog |